How to Make Pide: Turkish Pizza Bread Recipe
If you’ve never tried pide (aka Turkish pizza), you’re in for a real treat! This delicious dish combines the best of pizza and Turkish flatbread, resulting in a crispy, golden crust filled with savory toppings. Pide, also known as “Turkish pizza bread,” is an oven-baked pide with endless filling possibilities, from gooey cheese to spiced meats. It’s a street-food favorite in Turkey and has found fans worldwide for its versatility and amazing flavors.

What Is Pide? Turkish Pizza vs. Traditional Pizza
Pide is a traditional Turkish flatbread recipe that resembles pizza but has its own unique twists. Unlike classic Italian pizza, pide is often shaped like a boat with its edges folded inward, creating the perfect “cradle” for fillings. This allows for a range of options, from vegetarian Turkish pide recipes to hearty meat-filled pides, while adding a special touch to each bite. The fillings are different, too—Turkish pide with minced meat and cheese is common, but you’ll also find versions with egg, hot dog, and even burger pieces! Think of it as a customizable canvas for flavorful, filling combinations.
Ingredients for Homemade Turkish Pide
Each ingredient works together to create a balanced dough that’s flavorful, tender, and resilient enough to hold the fillings, making it ideal for this oven-baked pide. This simple combination results in a dough that’s perfect for Turkish pizza bread, capturing the authentic taste and texture you want in a traditional pide.
- All-Purpose Flour: All-purpose flour provides the structure and chewiness for pide dough.
- Sugar: It has two main roles here. First, it feeds the yeast, helping it activate and rise. Secondly, it adds a hint of sweetness to balance the savory flavors of the toppings.
- Olive Oil: Helps make the dough tender and adds a subtle richness that complements the toppings. It also helps keep the dough slightly moist, giving it a smooth texture that’s easier to roll out.
- Unsalted Butter: A richer flavor to the dough and, like olive oil, helps create a softer, more tender base.
- Warm Milk: Hydrates the dough and gives it a softer crumb than water alone. The milk’s warmth also helps activate the yeast, speeding up the rising process.
- Active Dry Yeast: The yeast is the magic ingredient that makes the dough rise and gives it that light, airy texture.

Step-by-Step Turkish Pide Recipe
Step 1: Making the Dough
This Turkish pide dough recipe is easy to follow, and the result is a light, fluffy, and slightly chewy base that’s perfect for any filling.
In a large bowl, add the flour and make a well in the center. Add salt on the flour and away from the well.
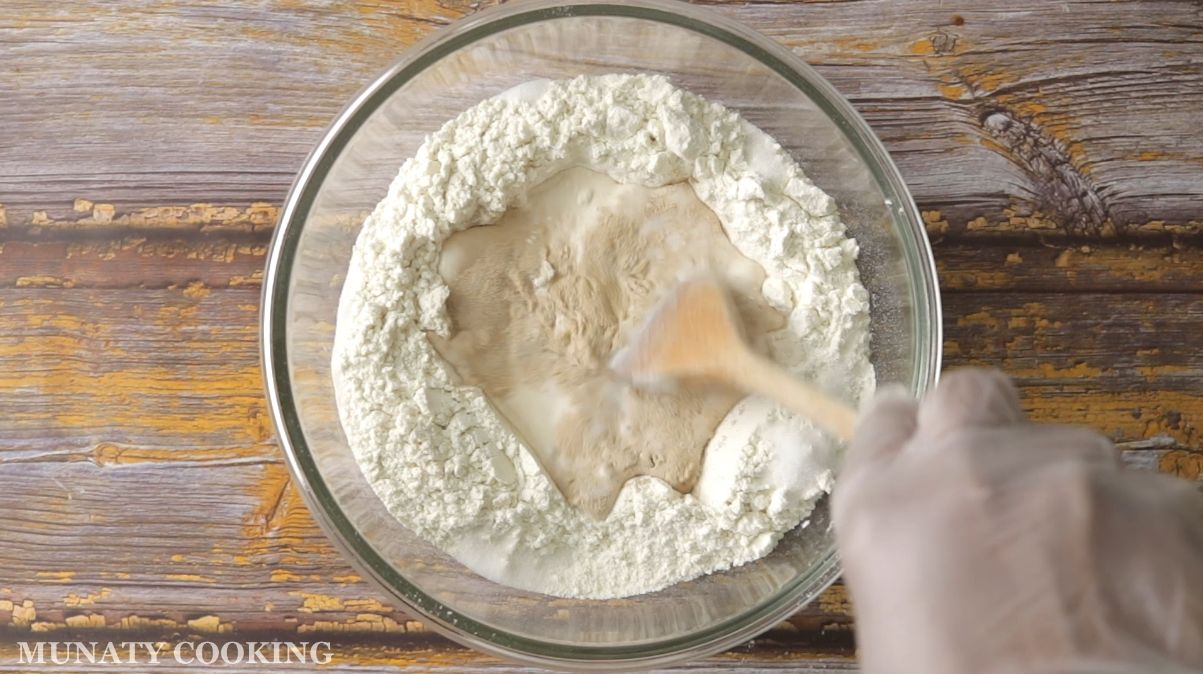
In the well, add warm milk, sugar, yeast, and olive oil. Place the butter near the flour on the side.
Stir the ingredients in the well, cover the bowl and let it sit for 10 minutes.

Once the yeast is bubbly, mix everything together and knead the dough.
Divide the dough into four equal balls, cover them, and let them rise for 40–60 minutes.

Step 2: Rolling Out the Dough
To create that traditional Turkish pide shape, we’ll roll the dough balls into ovals.
Place a dough ball on a floured surface and roll it out into an oval, about 14 inches long and 8 inches wide.

Transfer the rolled-out dough to a baking sheet lined with parchment paper.
Step 3: Adding Fillings and Shaping
Each filling gives the pide a unique flavor. Here’s how to add them:
Cheese & Egg Filling: Spread mozzarella and cheddar in the center. Make a small well and crack an egg in the middle. Spread it lightly with a fork, and sprinkle black pepper on top. Fold the edges inward, leaving a 3–4 inch opening in the center, and pinch the ends to seal.

Cheese & Burger Filling: Spread mozzarella, add a bit of ketchup, and sprinkle on cooked burger pieces. Fold and seal as above.

Cheese & Hot Dog Filling: Spread mozzarella and add hot dog slices. Fold and seal.

Cheese, Mint & Tomato Filling: Spread mozzarella, add cheddar, sprinkle dried mint, and top with tomato slices. Fold and seal as above.

Step 4: Brushing and Baking
Here’s where the magic happens—oven-baking the pide to perfection!
- Preheat your oven to 400°F (200°C).
- Brush the edges of each pide with the egg wash for a beautiful golden color.
- Bake for 5 minutes, then reduce the temperature to 350°F (180°C) and bake for an additional 6–8 minutes, or until the crust is golden brown.
- When done, take the pides out of the oven and rub the edges with butter for extra flavor and shine.

Serving Turkish Pide
Serve your homemade pide hot and fresh from the oven. Not sure what to serve with Turkish pide? Try a light salad, yogurt-based sauces, or even a side of Turkish tea to complete the meal.
Frequently Asked Questions
Yes! While yeast is traditionally used for a fluffy pide dough, you can make a homemade Turkish pide without yeast by substituting it with baking powder. The texture will be a bit different, but it’s still delicious.
This easy Turkish pizza recipe works with any number of fillings, from minced lamb to veggies. One popular filling is Turkish pide with lamb, especially seasoned with spices. Mozzarella and cheddar cheese are common choices, but feel free to get creative!

Pro Tips
- Activate the Yeast Properly:
Make sure your milk is warm (about 100°F to 110°F) when mixing with the yeast. If the milk is too hot, it can kill the yeast; if too cold, the yeast won’t activate. - Don’t Overfill the Pide:
Adding too much filling can make it difficult to fold and shape, and it may leak out during baking. Stick to a moderate amount of each ingredient to ensure even cooking and maintain the traditional pide shape. - Use Parchment Paper or a Baking Stone:
Line your baking sheet with parchment paper to prevent sticking, or if you have a baking stone, use it to help achieve an evenly crispy crust. Preheating the baking stone can make a noticeable difference in texture, giving the pide a slight char and extra crispiness. - Brush with Butter After Baking:
- Once the pide comes out of the oven, rub the edges with a bit of butter to enhance its flavor and add a lovely shine. This step is optional, but it really brings out the richness in the dough and gives a beautiful finishing touch.
- Watch the Baking Time:
- The baking time can vary depending on your oven, so keep an eye on the pide as it bakes. Start checking at the 5-minute mark after lowering the temperature to 350°F (180°C). Look for a golden-brown crust, and remember that slightly under-baking the center can keep it soft, which some people prefer.
Why You’ll Love This Authentic Turkish Pide Recipe
Whether you go for a cheese pide recipe, a meat-filled Turkish meat pide, or even a vegetarian Turkish pide, this recipe brings Turkish street food right to your home. Making Turkish pide pizza at home is fun, easy, and super customizable, making it perfect for family dinners, gatherings, or even a solo indulgence. Enjoy the journey from dough to golden-brown perfection with this step-by-step Turkish pide recipe!

Related Recipes
⭐PLEASE RATE AND REVIEW
If you have tried this Apple Turnovers recipe and liked it, please give it a 5-star rating and leave a comment below with your experience!

Pide Recipe
Ingredients
Dough Ingredients:
- 2 ½ cups all-purpose flour
- 2 teaspoons sugar
- ½ teaspoon salt
- 1 tablespoon olive oil or any cooking oil
- 1 tablespoon unsalted butter
- 1 cup warm milk
- 2 teaspoons active dry yeast
Egg Wash:
- 1 beaten egg
Filling Options
Cheese & Egg:
- Mozzarella cheese
- Cheddar cheese
- 1 large egg
- Black pepper
Cheese & Burger:
- Mozzarella cheese
- Cooked burger cut into small pieces
- Ketchup
Cheese & Hot Dog:
- Mozzarella cheese
- Cooked hot dog slices
Cheese, Mint & Tomato:
- Mozzarella cheese
- Cheddar cheese
- Dried mint
- Tomato slices
Instructions
Making the Dough:
- In a large bowl, add the flour and create a well in the center.
- Sprinkle salt around the flour, avoiding the well.
- In the well, add warm milk, sugar, yeast, and olive oil. Place the butter near the flour on the side.
- Stir the well ingredients to combine, then cover and let rest for 10 minutes to activate the yeast.
- Uncover and mix everything together, then knead by hand or with a stand mixer until smooth.
- Divide the dough into 4 equal balls, cover, and let rise in a warm place for 40–60 minutes, or until doubled in size.
Rolling Out the Dough:
- Place a dough ball on a floured surface and lightly dust a rolling pin.
- Roll each ball into an oval about 14 inches long and 8 inches wide.
- Transfer the rolled dough to a baking sheet lined with parchment paper.
Filling and Shaping:
- Cheese & Egg: Spread mozzarella and cheddar in the center. Make a small well, crack an egg in the middle, and spread it slightly with a fork. Sprinkle black pepper. Fold the edges inward, leaving a 3–4 inch opening in the center, and pinch the ends to seal.
- Cheese & Burger: Spread mozzarella, add ketchup as desired, then place burger pieces. Fold and seal as above.
- Cheese & Hot Dog: Spread mozzarella and add hot dog slices. Fold and seal as above.
- Cheese, Mint & Tomato: Spread mozzarella, add cheddar, sprinkle dried mint, and place tomato slices. Fold and seal as above.
Brushing and Baking:
- Preheat the oven to 400°F (200°C).
- Brush the edges of each pide with the egg wash.
- Bake for 5 minutes, then reduce heat to 350°F (180°C) and bake for another 6–8 minutes or until golden brown.
- Remove from the oven and rub the edges with butter for added flavor and shine.
Serving:
- Serve hot and enjoy your fresh, flavorful pides!
Video
Notes
- To ensure that the dough rises properly, start by activating the yeast. Use warm milk for this process; hot milk can kill the yeast, while cold milk won’t help it activate.
- Feel free to add your preferred fillings, such as cooked chicken, sausages, and various types of cheese. This recipe allows for a wide range of sandwich toppings.
- Keep an eye on the pide while it’s baking, as every oven varies. Your pide may take longer or shorter time to bake than expected.
- It’s best to place cheese at the bottom and then add your favorite toppings on top. This helps prevent any moisture from the toppings from soaking into the bottom of the pie and making it soggy.

I love how customizable pide is, so many delicious options for fillings! Can’t wait to try making this at home, it looks amazing!
Hope you give it a try , it is a delicious bread.